Removing antifouling
Health and safety information and different methods of removing antifouling
If your existing antifouling is in poor condition, we strongly recommend removing it completely before repainting. There are two methods outlined below, but you could consider employing a professional antifouling paint remover who will use equipment that’s not suitable for a DIY boater.
Step 1: Health and Safety
Before starting your preparatory work:
- Ensure the area you are working in is adequately ventilated.
- Ensure you are wearing the correct Personal Protective Equipment (PPE). We recommend safety spectacles, goggles or visors, nitrile rubber gloves, overalls (ensuring skin is not exposed) and a solvent mask or a respirator (if working on larger areas or in confined spaces).
- Depending on where you are re-antifouling, you may need to use bunds to collect liquid and solid wastes to prevent them from entering waterways or surrounding ground.
- You may also need to use suitable tenting to protect those not on the job.
- Make sure you understand and follow all local regulations.
Step 2: Preparation
Mask off areas to be stripped. Complete a high-pressure fresh water wash to remove loose antifouling. All residue and wash water should be contained and disposed of according to local legislation.
Step 3: Removal
Removal Method 1: Sanding
Using 80-grit coarse abrasive paper, wet sand your boat to reach the desired level or when all of the antifouling has been removed. Take care that the primer under the antifouling is not damaged too severely and ensure you don’t sand it back to the substrate. With GRP vessels the coarse abrasive paper may scratch and damage the surface.
Removal Method 2 - Chemical stripper
Use a suitable chemical stripper and follow the instructions very carefully. Ensure the primer under the antifouling is not damaged too severely. Be very careful to check that the chemical stripper is suitable for use on GRP surfaces. Some types may soften and affect the GRP surface, even if coated with primer. For best results, work on a small area at a time.
Step 4: Final clean up
Ensure surface is washed down well with either fresh water or water mixed with liquid detergent. Allow to dry completely before you start painting.
How much paint do I need?
We'll help you calculate how much paint is needed.
What product do you want to paint
What type of boat?
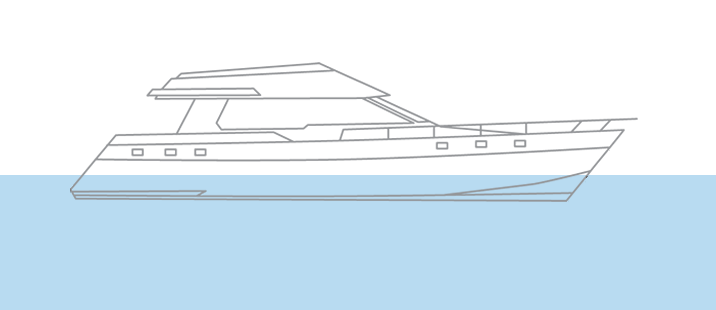
Full bodied craft
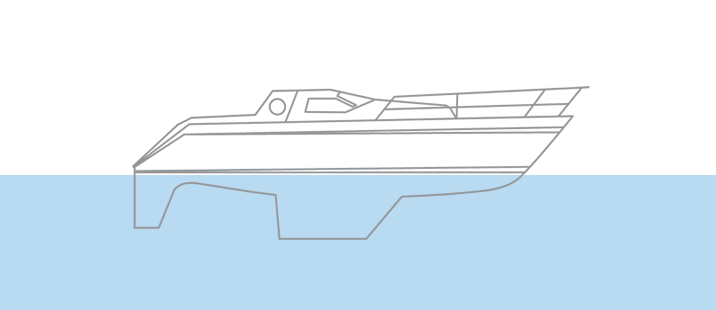
Fin keeled racing craft
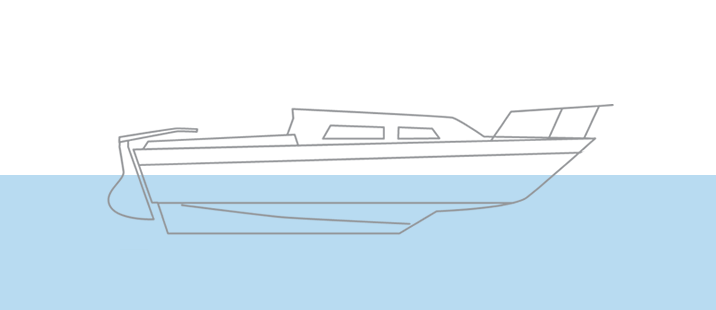
Medium draft racing craft
What is the underwater area?
Show Formulations1 x LWL x (B+D) = Underwater Area (m2)
0.5 x LWL x (B+D) = Underwater Area (m2)
0.75 x LWL x (B+D) = Underwater Area (m2)
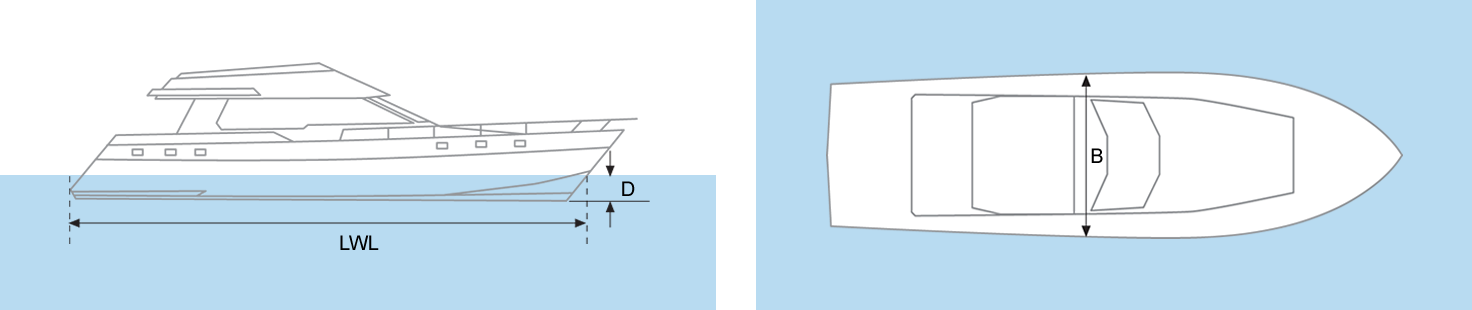
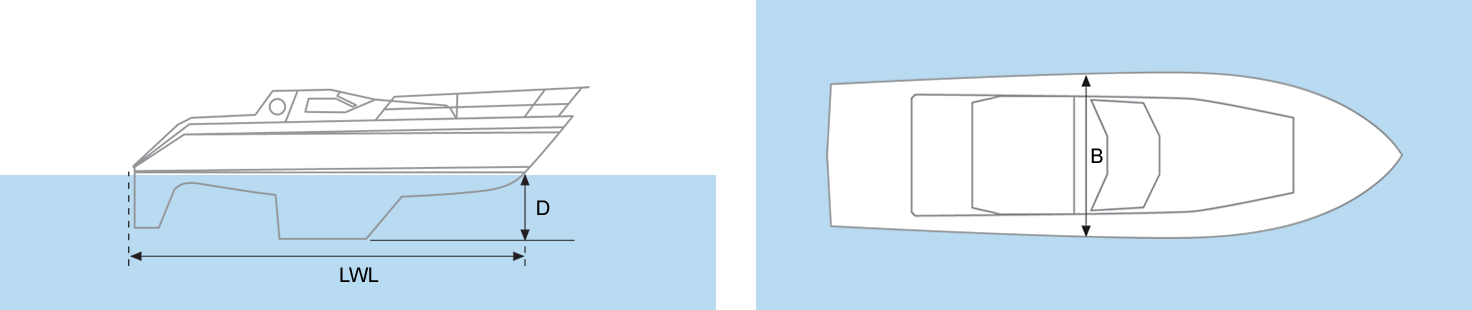

Abbreviations
LOA = Length Overall
LWL = Length Waterline
B = Beam
D = Draft
F = Freeboard
What application method?
Recommended no. of coats: ?
How many coats do you want to apply?
If you put less than the minimum recommended numbers of coats, it may affect the performance of the coating.
To paint a ? x ? x ? ??, with ? coats
You'll need ? litres of
Warning that this tool is an estimator only
View productPaint your boat like a pro
Find the best products to keep your boat in great condition
Get all the support you need to paint with confidence
Benefit from our continuous innovation and scientific expertise